3D printing is the process of creating a three dimensional object from a digital design by building up layers of material with a 3D printer.
3D printing is also known as additive manufacturing because material is added during the process of manufacturing to form the object. The opposite of this, known as subtractive manufacturing, is where material is cut away from a sheet or a block of material to form the object, for example manufacturing processes such as milling or laser cutting.
Additive manufacturing wastes very little material compared to subtractive manufacturing. The way that 3D printing forms an object in layers allows for objects to be created with very complex geometries that simply could not be manufactured in any other way.
3D printing is now being used across a wide range of industries including engineering, automotive, aerospace, construction, architecture, medicine, product design, food and fashion. Examples include:
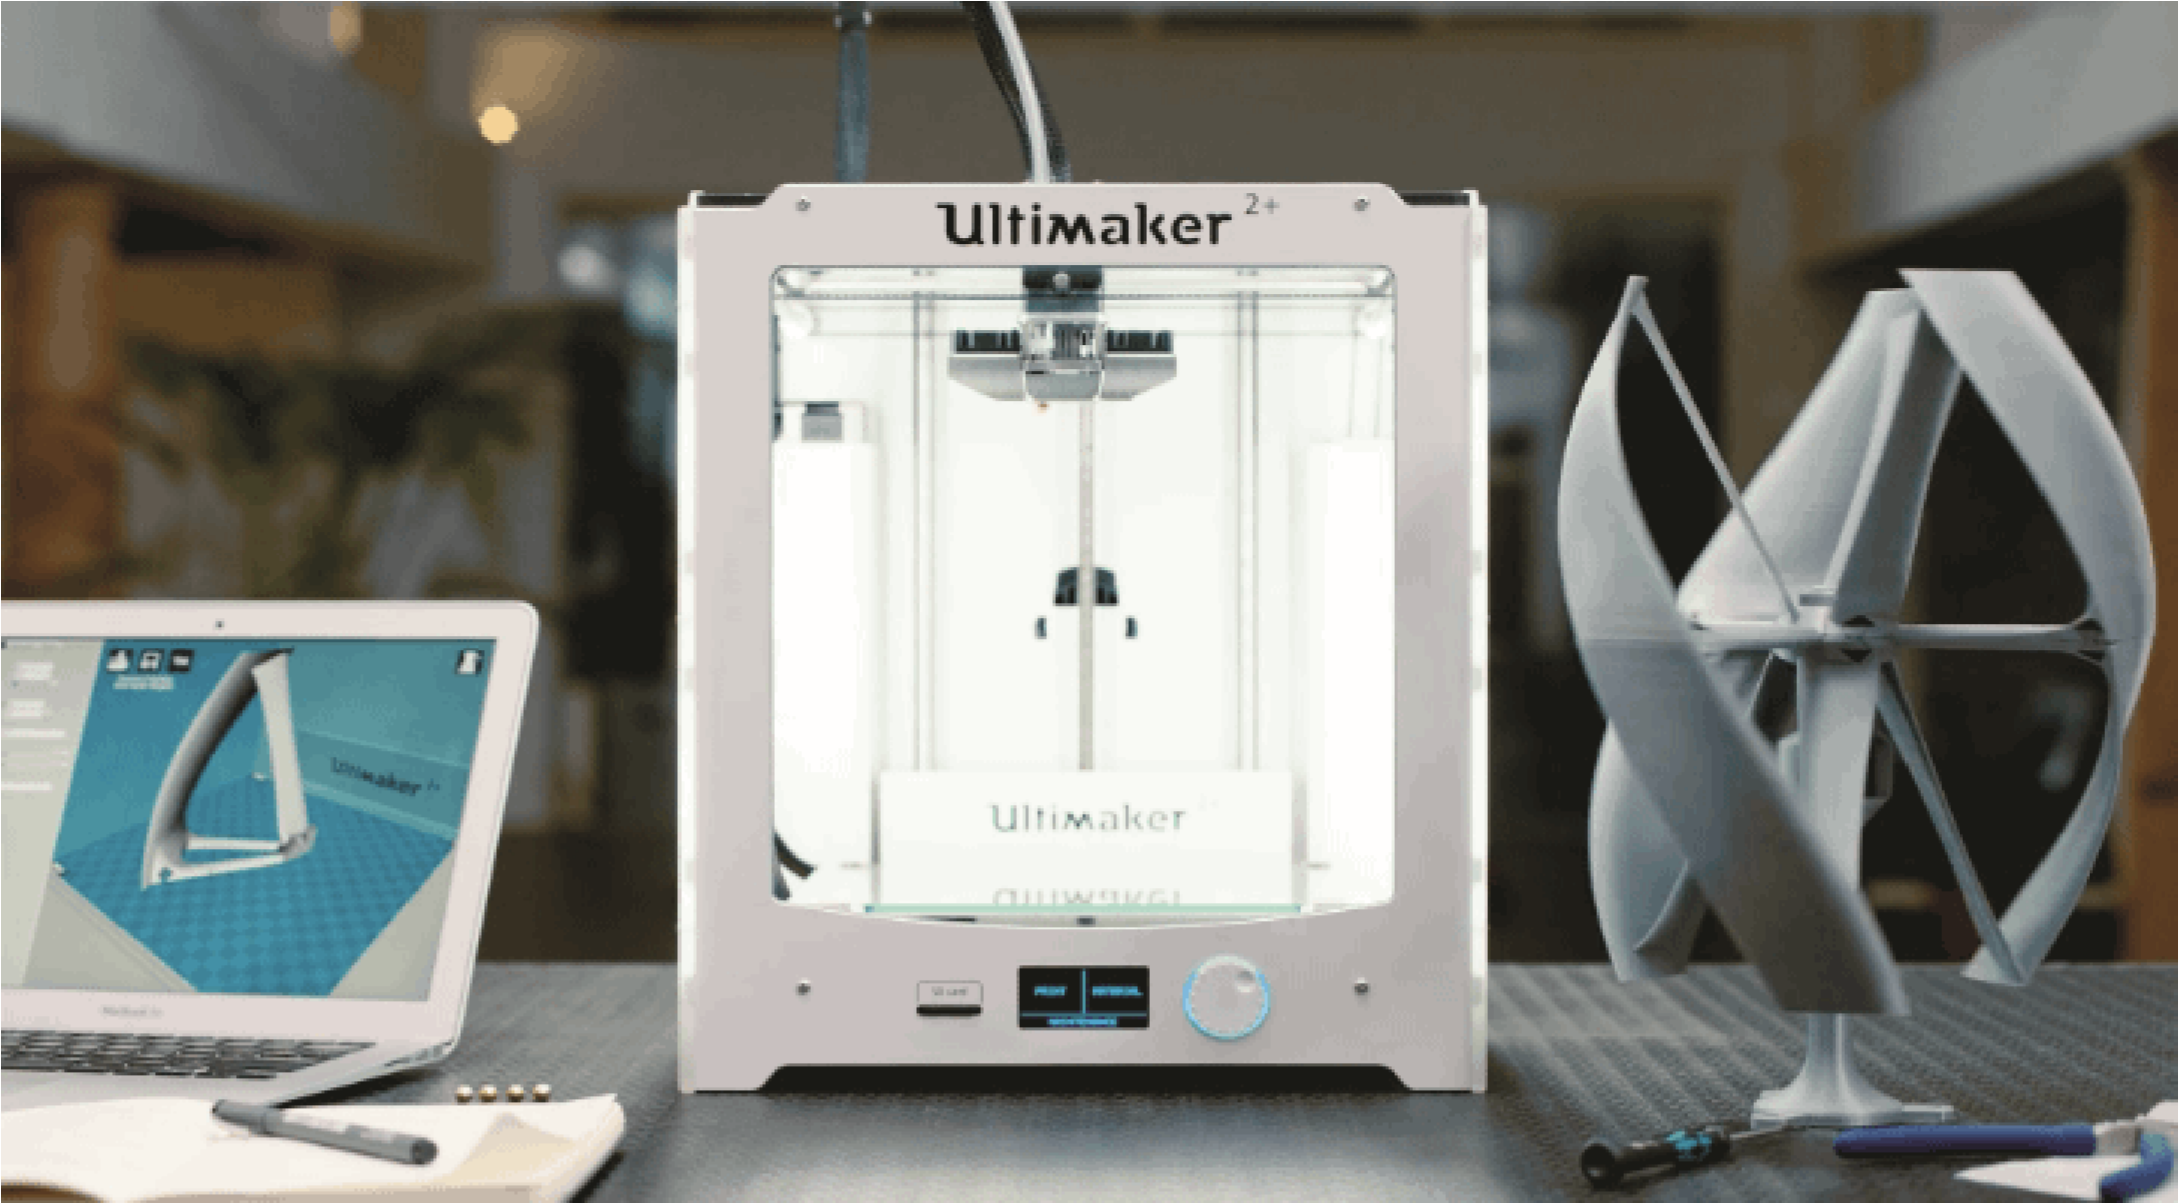
There are many different types of 3D printing technology, each using different materials and different methods to build up the layers of the print. The Ultimaker 3D Printers you will be using for the eCraft2Learn project use a type of technology called Fused Filament Fabrication (FFF) which is also known as Fused Deposition Modelling (FDM).
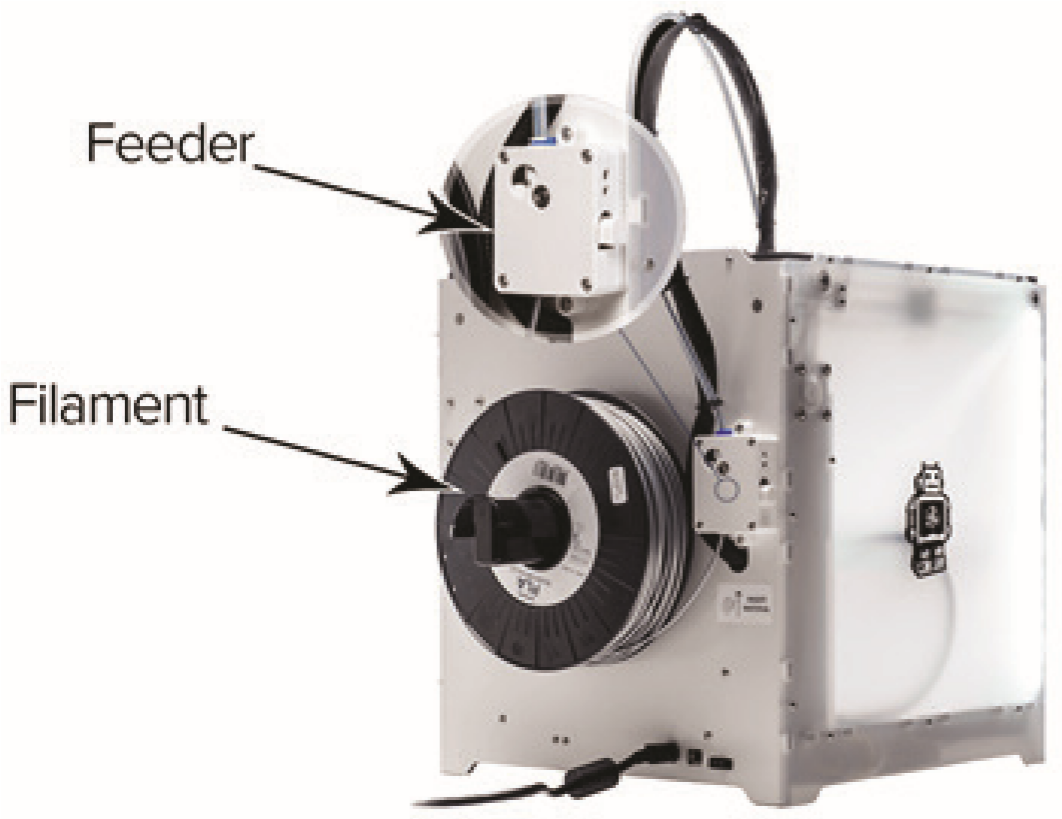
With an Ultimaker, thermoplastic material (filament) is fed from a roll at the back of the machine through a feeder, this pushes the material through a hollow tube (the Bowden Tube) into the print head (hot end) of the machine.
The hot end heats up the plastic until it melts and the feeder pushes it through a tiny nozzle onto the print bed. The hot end moves across the surface of the print bed depositing the molten plastic on the print bed as it moves to produce the first layer of the object.
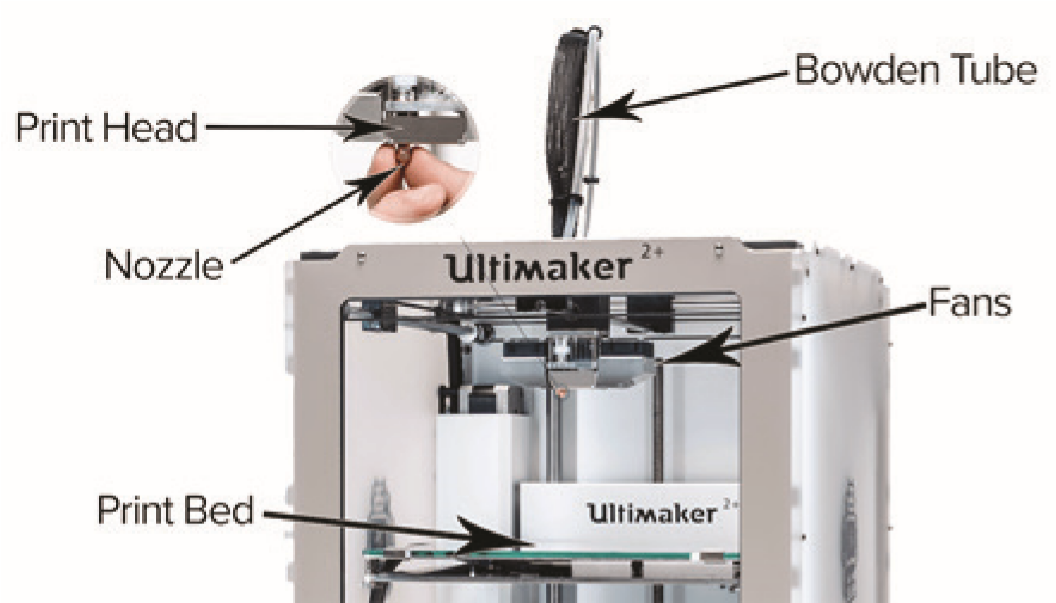
When the first layer is complete, the print bed moves down and the process is repeated for the second layer. The second layer of plastic is deposited on top of the first layer and fans at either side of the hot end blow cold air over the printed plastic to cool it down. As the plastic cools the layers stick (or fuse) together. This process is repeated for each layer until the object is printed.
Ultimaker Video: https://www.youtube.com/watch?v=8EGjA-PAij4
The 3D printing process consists of a number of stages from initial design to production of a 3D printed object.
The 3D printing process starts with a 3D model. You can design your own 3D model using 3D CAD software such as TinkerCAD, you can also download free models that have been designed by others from 3D model repositories such as www.youmagine.com or www.thingiverse.com these can be edited in 3D CAD software if required to customise the designs to your own requirements.
When the 3D model is complete, it needs to be saved as a suitable format. The most common 3D file type is .STL so save the file as a .STL file where possible. The Ultimaker software will also support the .OBJ .3MF formats, so if you cannot save as a .STL save as one of these.
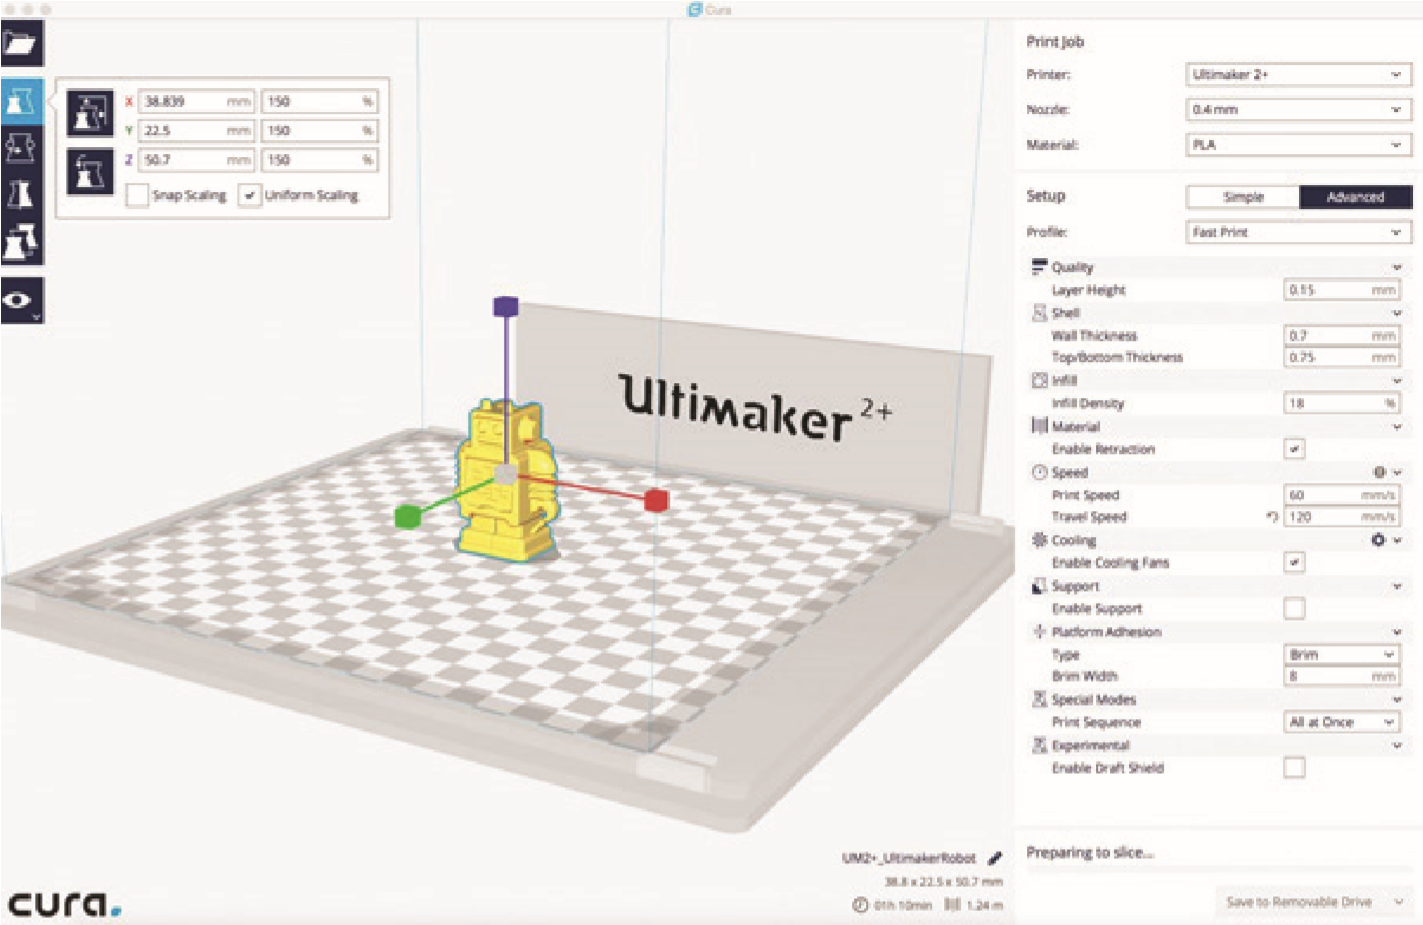
Before you can 3D print a CAD model, the model needs to be sliced and code needs to be generated that the machine can understand. This is done in special 3D printer slicing software. The Ultimaker slicing software is called Cura.
Cura manual: https://ultimaker.com/en/resources/20407-first-use-cura-2
Open your 3D model file in Cura. Then you can adjust the size of the print, move it’s position and orientation and change the print settings. Cura automatically slices the model into layers for printing and you can see approximately how much material the model requires to print and how long it will take to print. You can adjust the print settings to meet your requirements.
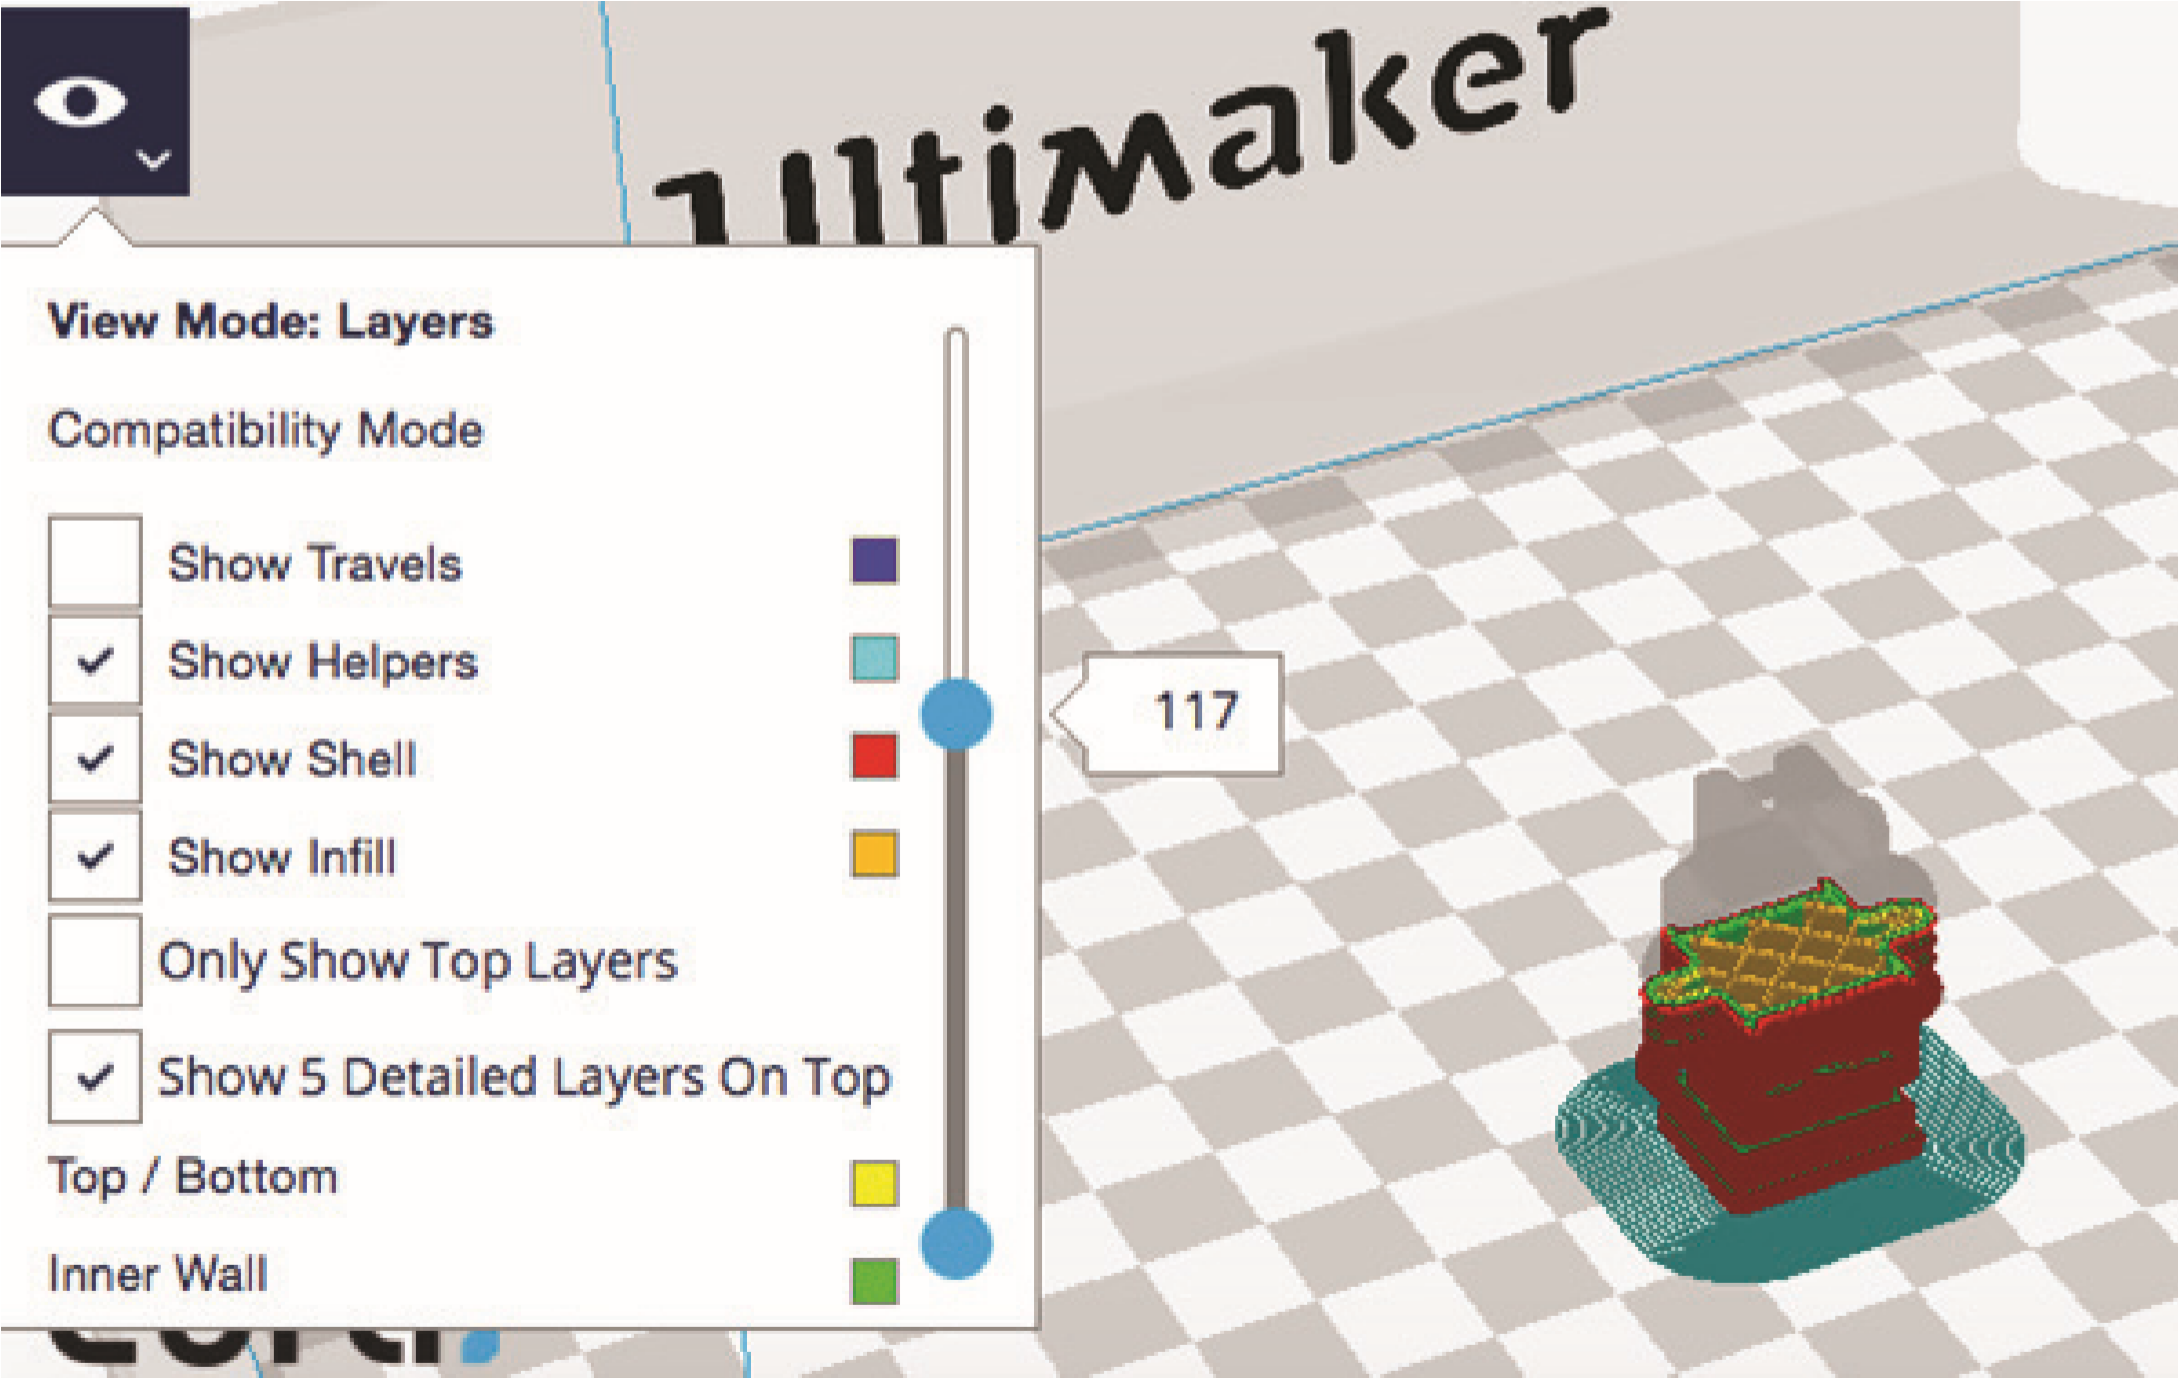
Before saving the file for printing, first you should check it to make sure there are no problems with the sliced model by inspecting the layers.
Switch the view mode to layers view, this shows you the path the print head will take to print each layer, scroll through the layers to check that your model will print as expected.
Once you are happy with your sliced model, save the file to an SD card if printing on an Ultimaker 2+ or save onto a USB if printing on an Ultimaker 3. This saves the sliced model as a .GCODE file which the 3D printer can read.

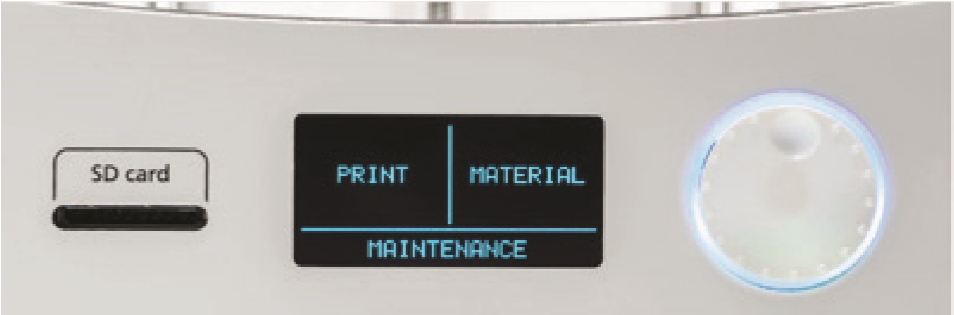
To 3D print your model, simply insert the SD card or USB into the front of the Ultimaker. Use the push/rotate button on the front of the printer to select Print, then select your file. this will start the 3D print.
Always watch (or keep checking) the first layer being printed if possible, If a print is likely to fail, it is usually due to a problem that occurs when printing the first layer.
 After your model has been 3D printed it may require one or more additional hand finishing techniques to finish the model.

![]()
![]() eCraft2Learn H2020-731345 - ULTIMAKER.
eCraft2Learn H2020-731345 - ULTIMAKER.
This work is licensed under a License Creative Commons Atribution 4.0 International.
This project has received funding from the European Union's Horizon 2020 Coordination & Research and Innovation Action Under Grant Agreement No 731345.